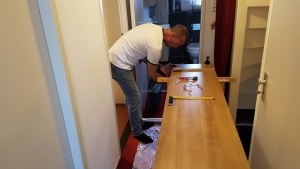
I regularly get questions about my Radioshack, especially about where my desk(-stand) came from and who built it. The question is simple: with the help of my carpenter friend Edwin (see photo below), I built the desk stand and the folding tabletop.
As I work for a global company and travel a lot, I’m fortunate enough to have a “home office.” So, 4 years ago, I needed new office furniture, such as a desk, chair, and more. When choosing my desk for my home office, I started thinking: what if this could also be something for my future Radioshack, since I was planning to renovate the entire room anyway? After consulting with the salesperson, the decision was made. I could easily order a nice desk, but more importantly, I could also order the “wood panels” for the desk in various sizes. This allowed me to create a drawing with my current equipment in mind and calculate how much wood paneling and other materials I would need (e.g., tools, materials, etc.).
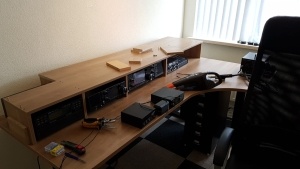
After making a few sketches, I discussed with my friend how we would build it, specifically how we would “fixate” the shelves on different sides and levels. Would we use glue, screws, or something else? The answer was simple: as radio amateurs, we didn’t want to use glue or screws, and we occasionally change (radio) equipment. This meant that new (different) equipment of different sizes will not fit within the existing shelves and spaces of the desk stand. So, instead, we used old-fashioned “wooden dowels”. This technique allows you to center the shelves and side panels, ensuring that all lengths, heights, and even depths are precisely aligned. You can, of course, use wood glue to secure the wooden dowels, but that means that if you want to replace shelves and/or side panels in the future, it’s almost impossible without damaging something. Moreover, the weight of the equipment and the perfectly sized holes where the wooden dowels must be inserted ensure a perfect fit and alignment, making the desk stand a solid and stable construction.
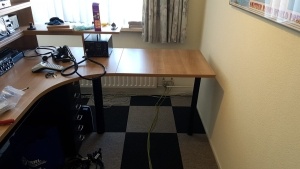
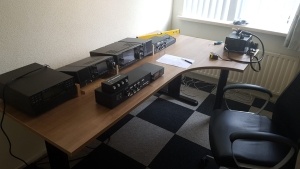
As you can see in the photos below, we added a wooden, folded tabletop to the right side of the desk. This is because, when the tabletop is lowered, I have access to the back side of my equipment, as well to my window, radiator, etc… Yes, I could have chosen not to use this small tabletop. However, then I wouldn’t have a test bench in place where I can solder, test equipment, and more. The desk and desk stand, with all the shelves, are designed so that all equipment has sufficient ventilation at the back and good access to cables, connections, etc… So, if you plan to build a desk stand for your Radio Shack yourself, always consider the following criteria:
- What is your budget…
- Do I have enough space around the desk for future access, ventilation, etc…
- Before starting, make a drawing(s) and a bill of materials (BOM)…
- When building a desk stand, consider the total weight of your equipment, including the desk and support frame, and its weight capacity…
- You might want to change something in the future, so don’t glue it down. Use screws if necessary, but wooden dowels without wood glue are preferred…
- Use the right tools and materials…
- ….
After the desk and the entire room were reupholstered, holes were drilled into the desk and deskstand for some cables and other small items. When I added and replaced new(other) equipment at a later stage, I used several simple tools that allowed me to drill and/or screw into specific parts of the desk without tearing down the current desk stand or diffrent levels. Easy tools for this are battery powerd angle drill machine and angle screwing machine
To conclude: buidling your own desk stand involves planning and knowing what you want. But besides that it also includes different aspects whereby thinking SMART (smart pricinple) can help you to a succesful and satisfied outcome of your project.
If you would like to know more about this topic please do not hestitate to drop me an email at roma-dx@ziggo.nl or just use the CONTACT form on this webpage.
73 Roberto PB5X